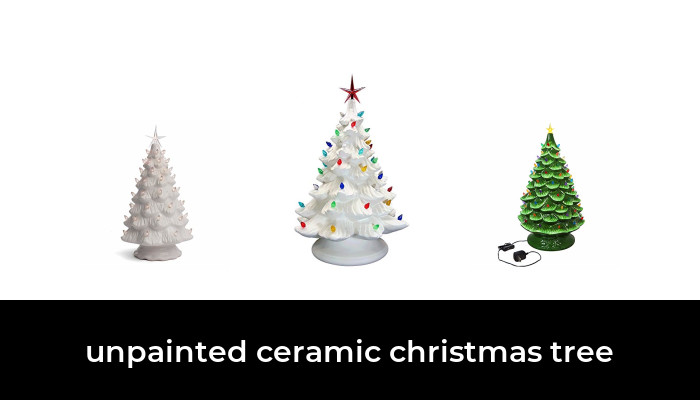

A good unpainted ceramic Christmas tree starts with the right blank: fired, unglazed bisque, a matching base, and the lighting parts you intend to use. A white tree is not automatically paintable bisque. Many white tabletop trees already have a glossy glazed finish and are sold as completed decorations.
For a traditional light-up project, the Creative Hobbies BIS 2034 large tree and BIS 2005 small tree are two useful options. Both include a base and lighting accessories. Choose between them by display space and how much painting you want to do, then decide whether you want an air-dried acrylic finish or a kiln-fired glaze.
Two unpainted ceramic tree kits to consider
Creative Hobbies BIS 2034: a larger tabletop project

Creative Hobbies BIS 2034 Ceramic Bisque Tree, 15.5-Inch, White, 1 Light-Up Kit
As an Amazon Associate we earn from qualifying purchases.
The brand’s BIS 2034 listing specifies a tree measuring 15.5 inches high including the star and 9 inches wide. The kit includes the ceramic tree and base, plastic light inserts, star, lamp cord, bulb, and a painting booklet. The unfinished white bisque gives you control over the final color.
This is the more suitable of these two options for a substantial table display or a family painting project. The larger branches provide more room for contrasting tips and other painted details. Measure the display surface and the clearance above it before ordering, including room for the cord.
Check the selected variant: the Amazon listing combines several sizes and contains inconsistent generic dimension and model-name fields. Use the selected Large variant and model BIS 2034, cross-checked against the brand page, rather than the smaller measurements elsewhere in the listing. Paint and brushes are not listed among the included components, so plan for them separately.
Creative Hobbies BIS 2005: a compact shelf-size project

The BIS 2005 kit measures 6.75 inches tall including its star topper. It contains one unfinished ceramic tree with base, multicolored plastic twist inserts, a star, electrical cord, bulb, and painting booklet. Select Small for this model; a separate 7-inch option in the same Amazon product family should not be assumed to be identical.
Choose this size for a smaller seasonal display or a project with less surface area to cover. A compact tree can still be fiddly: small branch recesses and light openings benefit from a detail brush and a light hand. It is also much less imposing than the 15.5-inch tree, so sketch the height on a piece of paper if you are buying it as a gift.
How to identify the right blank
Look for the words unglazed bisque, unfinished, or ready to paint in the actual description. Product photos alone can be misleading, especially when a seller shows a completed example alongside the blank you will receive. A smooth white glaze and raw white bisque require different finishing approaches.
Check these details before choosing a kit:
- Height definition: does the stated height include the base and star, or just the tree?
- Base and light opening: a tree body alone may need a separate matching base and a specific lamp fitting.
- Included accessories: distinguish the plastic branch inserts from the real electrical bulb inside the tree.
- Finish compatibility: confirm the clay and firing information if you intend to use ceramic glaze.
- Condition: inspect the base, branch tips, star opening, and light holes when the parcel arrives, before painting.
Buying a complete kit is particularly useful for a first project. A cheaper blank can become more complicated if you have to match a base, socket, star, and dozens of differently sized plastic inserts yourself.
Acrylic paint or kiln-fired glaze?
Acrylic paint is the straightforward home option. It dries without a kiln and lets you build color, highlight raised branches, and add decorative effects. Mayco’s Bisq-Stain acrylic guidance describes painting on bisque, layering color, and dry-brushing. Choose paint intended for the surface and follow its drying and finishing directions.
Ceramic glaze requires a compatible kiln firing. Before buying glazes, ask the studio that will fire your tree whether it accepts outside bisque, which products it permits, and which firing schedule it uses. The large BIS 2034 listing identifies cone 04 bisque and says it can be glazed and fired to cone 06. Those numbers are specific ceramic firing references; do not interpret them as a household-oven temperature or substitute a different cone.
Plan the finish before you start. Do not paint with ordinary acrylics and then assume the piece is ready for a glaze firing. Keep plastic inserts, the cord, socket, bulb, and star out of the kiln, and let the studio tell you how to prepare the separate ceramic pieces.
A practical painting sequence
- Check and organize the kit. Place the tree on its base, inspect for cracks, and gently test a few inserts before adding paint. Set all electrical and plastic components aside.
- Remove surface dust. A lightly damp clean sponge is a useful starting point; Mayco uses this preparation in its bisque painting instructions. Let the surface dry before painting.
- Paint the base and tree separately. Use a larger brush for broad areas and a smaller one beneath the branches. Apply smooth coats rather than filling details with a heavy layer.
- Keep openings clear. Avoid building paint or sealer across light holes, the star opening, and the surfaces where the tree rests on its base. Never force an insert into a tight hole.
- Add highlights after the base color dries. A small amount of pale paint on raised branch tips can suggest snow. Test the effect in an inconspicuous spot before covering the whole tree.
- Finish according to the paint directions. A compatible sealer can add protection or change the sheen. Mayco’s brush-on sealers go over dry color and must not be fired. A sealer is not automatically required for every acrylic product.
- Allow everything to dry, then assemble. Follow the supplied lighting instructions and keep paint away from electrical contacts.
Lighting, replacement inserts, and storage
The colorful plastic pieces in the branches transmit light from the bulb inside; they are not individual powered bulbs. When replacing them, compare stem diameter and length with your existing inserts. Names such as small, medium, twist, and bird do not establish universal compatibility. Test the fit gently before buying a large replacement pack or gluing anything in place.
Use the lamp components and bulb rating specified for your kit. Unplug it before assembly, cleaning, or changing the bulb, and stop using a cord or socket that is damaged. Keep the display stable, away from water and materials that could contact the bulb. Keep small inserts away from young children and pets. Turn the tree off when leaving home or going to bed, in line with CPSC holiday-lighting guidance.
For storage, lift the tree and base separately instead of assuming they are attached. Protect branch tips, store loose inserts in a labeled bag, and cushion the electrical parts so they cannot knock against the ceramic. For most home crafters, the best choice is the size that fits the display, supplied with matching lighting parts, finished with a paint system they can use confidently.
Image note: Existing category illustration retained from original article.