
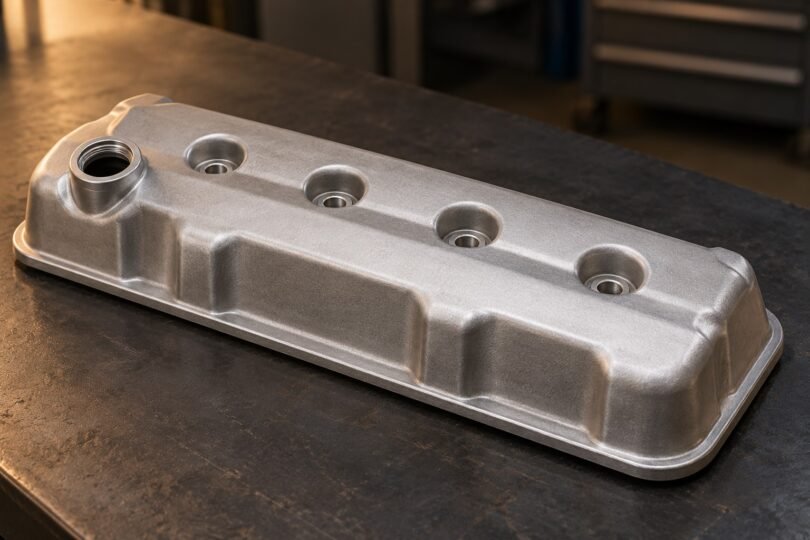

The right LS engine valve covers depend on the cylinder heads, ignition coils, valvetrain and crankcase-ventilation system already on the engine. A cover that looks right in a photograph can still have the wrong bolt pattern, interfere with a rocker arm or leave the PCV system incorrectly connected.
For a repair on a road-going vehicle, begin with an application-specific replacement. For a custom build, compare the exact cover dimensions and installation instructions before choosing a finish. The examples below illustrate different buying routes; none is a universal replacement for every engine described as “LS.”
Start with the engine and the job
Write down the engine code, cylinder-head identification, vehicle year and any changes to the heads, coils or rocker arms. On a swapped engine, the vehicle’s original registration details are not enough to identify engine parts. Keep the donor-engine information and current component numbers together.
- Repairing a leak: identify whether the fault is the gasket, bolt grommets, cover, sealing surface or ventilation system before replacing parts.
- Changing appearance: check whether the item is an oil-sealing valve cover or a cosmetic cover that sits over the ignition coils.
- Accommodating modified rockers: obtain the cover and rocker manufacturers’ clearance requirements before ordering a taller cover.
Match the actual head-to-cover fasteners and gasket profile. Do not treat a traditional small-block Chevrolet cover, a Gen III/IV LS cover and a Gen V LT cover as interchangeable simply because each is advertised for a Chevrolet V8. Even “center bolt” is a mounting description rather than a complete application specification.
Three valve-cover options to investigate
Application-specific repair: Dorman 264-969
Dorman 264-969 is a specific-fit aluminum replacement cover. Dorman lists a gray finish, a 2.25-inch height, included mounting hardware and package contents of a valve cover and gasket; an oil filler cap is not included. Its OE cross-reference list includes GM 12642655.
This is a sensible starting point when the manufacturer’s fitment lookup and OE cross-reference match the damaged part. It is not a matched pair of dress-up covers. Confirm the required side, engine and existing connections with the supplier rather than treating Dorman’s broad application summary as proof that every listed vehicle configuration fits.
Standard-height custom layout: Holley 241-91
Holley 241-91 is a pair of standard-height cast-aluminum, center-bolt covers with a satin-black textured finish. The design mounts compatible ignition coils directly to angled posts. Holley lists a billet oil cap and baffling, while gaskets and mounting hardware are not included.
The 241-88 through 241-91 instructions specify LS1, LS2, LS3, LS6 and LS7 applications using coils with 72 mm mounting-bolt spacing. Check the coil body, connector access and surrounding accessories as well as that measurement.
Important use restriction: Holley’s product page classifies 241-91 for uncontrolled, non-emissions-controlled vehicles and warns against installation on an emissions-controlled vehicle. Physical fit does not override that restriction.
Additional internal room: Holley 241-112
Holley 241-112 is a satin-black tall-cover pair with integrated coil mounts. Holley specifies 0.54 inch more internal clearance than factory-height covers, OE-style baffles and vents, and a billet fill cap. Coils and gaskets are not included.
Use the tall-cover installation instructions, 199R10868 when planning hardware: they call for the supplied extended bolt, spacer and grommet assemblies. A general product-page bullet about reusing original bolts should not be read as permission to substitute shorter fasteners.
The same emissions-controlled-vehicle restriction appears on this product page. Also, extra cover height does not approve an arbitrary aftermarket rocker system. The instructions still require checking compatibility with the valvetrain manufacturer.
Coil mounts and engine-bay clearance
Decide whether you will retain the existing coil brackets, mount coils directly to new covers or use a separately engineered relocation arrangement. Those choices affect brackets, wiring reach and spark-plug-wire routing. A kit described as a coil cover may only conceal the ignition system: for example, Assault Racing’s ARC V4006 is explicitly an ignition-coil cover that mounts over specified factory brackets.
That manufacturer also excludes the early 1998 perimeter-bolt LS cover from its mounting applications. This is why inspecting the engine matters more than relying on a broad model name. Look at fastener positions, not just the shape of the casting.
Check room around alternator brackets, intake components, wiring and hoses. Holley’s instructions include an offset coil bracket for certain high-mounted driver-side alternator arrangements. If your accessories interfere, stop and obtain an approved combination; avoid improvising by cutting structural brackets or forcing coils against nearby parts.
Rocker clearance: measure the complete combination
Overall height and usable internal clearance are different measurements. A tall-looking cover may have internal ribs, bolt wells or baffles occupying the space a rocker needs. The relevant question is whether the moving valvetrain clears every internal feature throughout its operating range.
Have the engine builder verify the actual rocker, retainer and cover combination before operation. Treat a stated cam-lift allowance as conditional on the specified rocker geometry. Do not transfer a clearance statement from one cover in a brand’s range to another, and do not use a thicker or stacked gasket as an improvised clearance solution.
PCV, breathers and oil filling
Map the existing crankcase-ventilation connections before ordering: which cover has each hose, how vapors are metered and where fresh air enters. An oil-fill opening, a baffled vent and a PCV connection have different functions.
Holley’s standard-cover instructions warn that some original arrangements have internal PCV restrictions; the replacement installation may require an appropriate external in-line valve. This is an application-dependent instruction, not a reason to add a random valve or replace the closed system with open breathers. Have the installer preserve the required ventilation and emissions configuration.
Also confirm access to the fill cap after installation. A dry-sump-specific cover without an oil-fill provision is a separate product configuration and should not be substituted solely because its mounting holes appear to match.
Gaskets, fasteners and installation planning
Compare what is included with what the engine actually needs: two cover gaskets, grommets, correct-length retention hardware, coil fasteners, brackets and a suitable cap. A single replacement cover and a two-cover set should not be compared as equivalent packages.
Fel-Pro’s installation guidance emphasizes clean sealing surfaces and following the manufacturer’s torque specification and sequence. Its valve-cover gaskets are generally installed clean and dry; sealant belongs only at application-specific locations where the instructions require it, not smeared over the entire gasket.
Use the exact cover instructions and vehicle service information for tightening values. Keep inch-pound and foot-pound units distinct, and use an appropriate torque wrench. Extra tightening is not a sound response to a persistent leak. Recheck the gasket seating, hardware and diagnosis instead.
Before you order
- Confirm the engine generation, head casting and actual bolt pattern.
- Match the gasket profile and required cover side or pair.
- Verify coil spacing, bracket arrangement and wiring clearance.
- Get approval for the installed valvetrain and surrounding accessories.
- Confirm PCV routing, baffling, oil filling and permitted vehicle use.
- Compare the complete installed cost, including missing seals and hardware.
Choose the cover that solves the identified problem with the fewest unverified changes. Correct fitment, ventilation and sealing matter more than a long list of finishes or an unsupported “best” ranking.