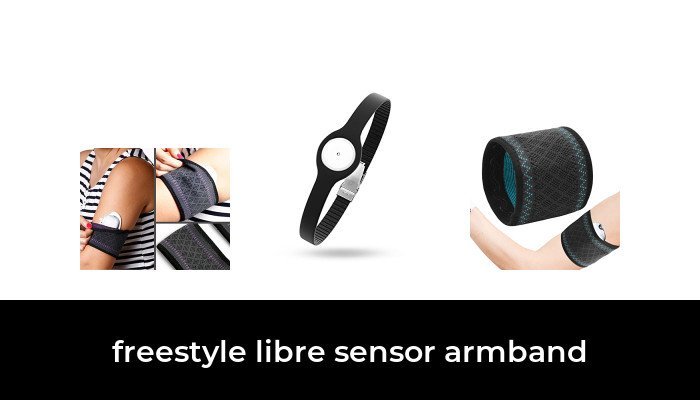

A FreeStyle Libre sensor armband needs to fit two things: your exact sensor and your upper arm. Start with the full name on your sensor box. A holder made for Libre 14 day or Libre 2 is a different purchase from one made for Libre 3 or Libre 3 Plus.
For a trim-to-fit holder, the two Divoti models below offer clearly identified options for those sensor families. Libre 2 Plus buyers should confirm the exact version with the accessory maker before ordering. These are third-party accessories, not glucose sensors, and manufacturer compatibility claims are not Abbott endorsements.
Which FreeStyle Libre armband should you buy?
- For Libre 14 day or Libre 2: consider Divoti’s Badge 20104 armband. Its manufacturer listing names those two sensors.
- For Libre 3 or Libre 3 Plus: consider Divoti’s smaller Badge 20107 armband. Divoti explicitly names both models on its current product page.
- For Libre 2 Plus: do not infer fit from “Libre 2” alone. Confirm your country, exact sensor name and the holder’s supported dimensions before buying.
- For extra coverage without a molded holder: a fabric sleeve is a different type of accessory. Check its arm-size range, seams and fit; a generic sleeve does not establish sensor-specific compatibility.
1. Divoti Badge 20104: Libre 14 day and Libre 2
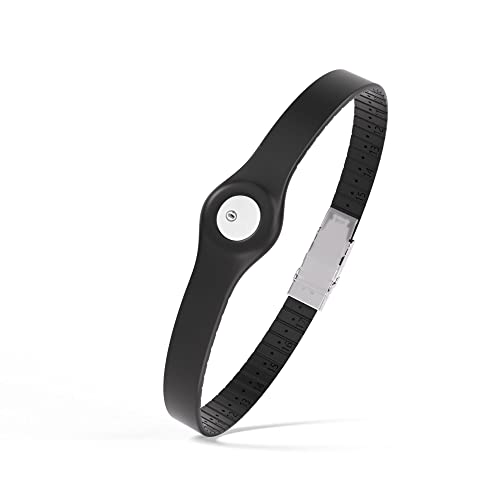
The Divoti Badge 20104 is a sensor-cover armband with a trim-to-fit strap. Divoti lists silicone and TPU materials and identifies it for FreeStyle Libre 14-Day or Libre 2. The selected Amazon option below is Black, model 20104MBL.
Why consider it: the holder is designed around the older, larger Libre sensor family, and the strap can be shortened to fit. This is a focused option if you want a removable band rather than adding another adhesive patch.
Check before ordering: the manufacturer page does not name Libre 2 Plus. Do not substitute this holder for the smaller Libre 3 version. Confirm the usable strap range and instructions before trimming, because cutting the strap is irreversible.

Divoti Badge 20104MBL Sensor Cover Armband for Libre 14-Day or 2, Black
As an Amazon Associate we earn from qualifying purchases.
2. Divoti Badge 20107: Libre 3 and Libre 3 Plus
Divoti’s Badge 20107 product page identifies this separate holder for FreeStyle Libre 3 and Libre 3 Plus. It also uses a trim-to-fit design. The selected Amazon variant is Black, model 20107MBL; its listing title may use the shorter “Libre 3” name.
Why consider it: it provides a model-specific alternative to a holder sized for the earlier Libre 14-Day/2 sensors. Choose by model number as well as color when a retailer groups several sensor styles together.
Check before ordering: verify that the selected listing still shows 20107MBL and the Libre 3-style holder. Some Amazon feature text mixes Libre model names, so confirm the selected model and packaging against Divoti’s compatibility information. The smaller sensor opening does not promise better glucose readings or longer sensor life.
Check sensor compatibility before arm size
A product title saying only “FreeStyle Libre compatible” is not specific enough for a molded cover. Abbott identifies the Libre 14 day sensor as 35 mm across and 5 mm high. Its Canadian comparison lists Libre 2 at 35 × 5 mm and Libre 3 Plus at 21 × 2.9 mm. That size difference is why the molded holders are not interchangeable.
Libre 2 Plus deserves an extra check. Abbott’s regional materials are not consistent: its U.S. comparison guide lists 30 × 5 mm, while its Philippines FAQ lists 35 × 5 mm. That discrepancy does not establish that a particular holder fits your sensor. Use your supplied sensor instructions and ask the accessory maker to confirm your exact market/version, rather than buying from a generic compatibility claim.
Armband, sleeve or adhesive patch?
- Sensor-holder armband: combines a shaped cover with a strap around the arm. Look for an exact sensor match, an accessible fastening and an adjustment range that works without overtightening.
- Fabric sleeve: covers a broader area and relies on fabric fit. Consider whether it rolls, slips, traps moisture or catches the sensor during removal. It is not a replacement for the sensor’s own adhesive.
- Adhesive overpatch: adds tape around or over the sensor. It avoids a circumferential strap but introduces more adhesive contact. Follow your sensor’s specific over-bandage instructions and consider previous skin reactions.
These options solve different shopping needs. A reader carrying case, test-strip pack or ordinary first-aid bandage is not a sensor armband.
Measure and fit the band carefully
- Measure the intended position. Use a flexible tape around your upper arm where the strap will sit. Compare that measurement with the selected variant’s usable range, not simply “one size.”
- Check the closure. Make sure you can fasten and release it comfortably without dragging the holder across the sensor.
- Read trimming instructions first. For cut-to-fit straps, confirm the sensor fit and return conditions before cutting. Leave adjustment room as the manufacturer directs.
- Check comfort during ordinary movement. The band should not require painful pressure to stay in place. Stop wearing the accessory if it causes discomfort, rubbing or irritation, and ask your healthcare professional about skin concerns.
- Plan cleaning and drying. Follow the accessory maker’s care instructions and inspect its strap and closure for wear. A damp band and a wet sensor site need attention after bathing or exercise.
What an armband cannot fix
An armband does not change Abbott’s approved sensor placement, restore a displaced sensor or establish that a questionable glucose reading is accurate. Follow the instructions supplied for your sensor and country.
Abbott’s U.S. safety information specifies the back of the upper arm. It also says to remove and replace a sensor that has loosened or whose tip is coming out; do not try to reinsert it or simply strap it back down. If readings do not match symptoms or expectations, use a fingerstick blood-glucose result for treatment decisions and seek medical attention when appropriate.
If you add tape, Abbott’s sensor application and adhesion guide says an over-bandage must be applied at sensor application, must leave the center opening uncovered, and should not be removed before the sensor is ready for removal. It also limits water immersion to 1 meter for 30 minutes. An accessory advertised as waterproof does not extend the sensor’s own limits.
Common buying questions
Does an armband replace the sensor adhesive?
No. It is an additional accessory. The sensor still needs to be applied and worn according to Abbott’s instructions; a loose sensor should not be kept in use by tightening a band.
Will a Libre 2 armband fit Libre 3 Plus?
Do not assume so. The molded opening needs to match the sensor. The Divoti 20104 and 20107 above are separate products for different sensor families.
Do you need an armband for every sensor?
No universal requirement is established here. If your sensor stays attached and is comfortable, buying an extra accessory may not be necessary. If adhesion repeatedly fails or your skin reacts, discuss the problem with your healthcare professional or Abbott support.
How were these options selected?
This is a specification-based buying guide. The shortlist uses identifiable model numbers, manufacturer-stated compatibility and exact retail variants. It is not based on hands-on wear testing, and no product here has been ranked by clinical accuracy.