
For a porch sign that gets wet, our first choices are western red cedar for a natural wood look and Exterior-rated MDO plywood for a smooth painted design. A straight pine board is a reasonable lower-cost choice for a genuinely sheltered porch. The important decision is how much rain, sun, and ground moisture the sign will see, followed by how you finish its faces, edges, and end grain.
A decorative board under a deep roof has an easier job than a welcome sign beside an uncovered step. Choose the material for the actual location, rather than assuming every product sold as a “wood sign blank” belongs outdoors.
Reviewed October 4, 2026. This is a research-based materials guide using wood-industry, manufacturer, and Forest Service guidance. We have not weather-tested these boards or measured a finished sign’s lifespan. Recommendations below are practical judgments based on the material and exposure, not laboratory rankings.
Which wood should you use for a porch sign?
| Material | Our suggested use | Main trade-off |
|---|---|---|
| Western red cedar | A solid-board sign with visible grain, including a more exposed porch | Choose a sound board and protect the finish; the wood is relatively soft |
| Pine | A painted seasonal sign under substantial cover | Lower-cost stock can mean more knots and preparation; do not depend on paint alone in a persistently wet location |
| Exterior-rated MDO plywood | A flat, opaque-painted panel or larger graphic | Its overlay is a paint base, not a finished weatherproof surface; cut edges need attention |
| Exterior-rated sanded plywood | A painted panel when suitable MDO is difficult to find | Visible grain, patches, or voids can require more surface preparation |
| Ordinary MDF or interior craft plywood | Indoor displays | Do not assume a coat of sealer changes an indoor material’s intended exposure rating |
These are use-based recommendations, not a claim that one species always outlasts another. Board quality, coating compatibility, drainage, and maintenance all affect the result.
Start with the sign’s location
- Deep, dry cover: A painted pine board is worth considering if wind-driven rain rarely reaches it and you bring it inside during bad weather.
- Occasional rain or strong sun: We would spend more on cedar or an appropriately finished Exterior-rated panel.
- Frequent soaking, splashing, or contact with wet paving: Move or mount the sign so it can drain and dry. A better board does not solve a location that keeps the bottom wet.
Check the site after a rainy day. The area directly below the roof edge, beside a planter, or near a sprinkler may be much wetter than the rest of the porch. That observation is more useful than the label “covered porch.”
1. Western red cedar: our choice for a visible-grain sign
Cedar is a sensible starting point when you want the board itself to be part of the design. The USDA Forest Service’s western redcedar profile describes it as light in weight, relatively soft, and subject to small dimensional changes. It identifies the heartwood’s natural decay resistance and paint-holding properties. That supports choosing it for an outdoor decorative board, but it does not make every cedar board rot-proof.
Look for a straight piece with a sound surface. A knotty board can suit large rustic lettering; clear stock makes a fine stencil easier to position. Because cedar is soft, handle the finished sign carefully and avoid buying a board with damage you would have to hide beneath a light-colored background.
Finishing consideration: For an opaque design, choose a stain-blocking primer specifically suitable for western red cedar, followed by a compatible exterior finish. Cedar’s extractives can discolor paint. For a grain-showing design, choose a finish intended for exterior wood and accept that appearance and maintenance needs will differ from a painted sign. Real Cedar’s finish-selection guidance explains these options.
2. Pine: a practical choice for a sheltered painted sign
For a seasonal decoration you can keep dry and store indoors, we would consider a well-selected pine board before buying a specialty blank. Compare actual prices locally: a cheap board that needs extensive filling and sanding may offer little saving over cleaner stock.
Select the board in person when possible. Sight along its length for bowing or twisting, inspect both ends for splits, and check that knots are tight. Plan the lettering before cutting so a knot does not sit beneath a delicate letter or border. Buying a straight board is easier than trying to conceal a distorted one with paint.
Preparation matters. The Southern Forest Products Association’s finishing guidance calls for clean, dry wood and following the finish manufacturer’s instructions. Its exterior-siding guidance uses primer and exterior paint as a system. Apply that general approach to a decorative sign while using the specific product labels for coverage, drying, and recoating.
Our limit: Pine is our sheltered-use recommendation, not our default for an unprotected year-round sign. If the position regularly gets soaked, we would change the material or the location.
3. Exterior-rated MDO or plywood: good for painted panels
MDO means medium-density overlay: a resin-fiber surface on plywood. It is different from MDF, or medium-density fiberboard. For an opaque-painted sign, MDO can save work because its face is designed to accept paint. Ask for an Exterior-rated panel suitable for the intended application, rather than ordering solely by the letters “MDO.”
APA’s MDO guidance calls for a compatible primer and topcoat for exterior use and sealing exposed panel edges. Follow the panel supplier’s instructions if the board comes preprimed. Cutting a finished panel exposes new edges that still need protection.
Sanded Exterior-rated plywood is an alternative when you want to cut a custom outline or wide panel. Examine the face, edges, and core before buying. A rough construction panel may take much more work to produce a clean painted sign than a panel selected for appearance.
Exterior and Exposure 1 are different ratings
The plywood bond classification matters. APA explains that panels commonly called CDX are Exposure 1 rather than Exterior, and are not intended for long-term weather exposure. Read the actual panel stamp or product specification. “Exterior glue” in an online listing is not a substitute for verifying the panel’s classification and intended use.
Materials to approach cautiously
- Ordinary MDF: Its smooth face is attractive for crafts, but use a specifically exterior-rated product if the sign will be outside. Manufacturer MEDITE distinguishes interior moisture-resistant MDF from exterior grades and says its exterior product still requires full coating to its guidelines. “Moisture resistant” alone is insufficient.
- Unspecified craft blanks: Ask for the species or panel type, exposure suitability, and actual thickness. A listing photograph cannot establish those details.
- Reclaimed or pallet wood: Use wood with a known history and sound condition. Unknown treatments, old coatings, hidden fasteners, and splits complicate a simple project.
- Pressure-treated lumber: It is not our first choice for a small decorative sign. If you use it, follow its supplier’s cutting, handling, drying, and finishing directions; do not assume freshly purchased material is ready for paint.
How to choose the board size and thickness
Make a paper layout first. Check the width needed for the lettering, the space around it, and the clearance beside the door. Use the board’s actual measurements, since nominal lumber dimensions can differ from the piece you take home.
As a starting point for a tall, narrow leaning design, consider a board around 3/4 inch thick and assess its weight and stiffness at your planned length. That is a project suggestion, not a universal minimum. A small hanging sign, a large panel, and a multi-board design need different support. Thin craft sheets can be convenient for small cutouts but may be a poor choice for a tall unsupported sign.
Plan the mounting before painting. A leaning sign needs a reliable restraint where wind, pets, or a closing door could knock it over. Keep the route to the door clear. If attaching the sign to a wall or railing, choose hardware appropriate to both the sign’s weight and the supporting surface.
Finish the whole sign, including the parts you cannot see
- Cut and prepare first. Complete the shape and mounting holes, remove splinters, and prepare the surface to the coating maker’s instructions. Clean off sanding dust. Use the tool manufacturer’s recommended protection when cutting or sanding.
- Start with dry wood. Do not rush a damp board into a paint system. Follow any moisture and weather limits on the coating label.
- Use a compatible exterior system. Match the primer, background coating, lettering medium, and any topcoat. Follow stain-blocking guidance where needed.
- Protect faces, back, edges, and ends. Real Cedar recommends finishing all six sides before installation. On a panel, pay particular attention to cut edges and follow APA or the panel maker’s edge-sealing directions.
- Allow the specified drying and curing time. Touch-dry paint is not necessarily ready for adhesive lettering, stacking, or rain exposure. Use the instructions for the exact coating and lettering product.
- Check the finished assembly. Repair any coating damage from fitting hardware. Keep the lower edge out of standing water and avoid trapping a wet surface against the back.
An exterior clear coat is not automatically necessary over exterior paint, and an incompatible one can create another maintenance problem. Use one only when the coating and lettering manufacturers support that combination. Try the complete paint-and-lettering system on an offcut first.
A short buying checklist
- Choose the material for the wettest conditions the sign will actually face.
- Verify the species or the panel’s Exterior classification.
- Check flatness, tight knots, splits, edge damage, and actual dimensions.
- Include primer, finish, lettering supplies, and suitable mounting hardware in the budget.
- Buy a little extra material or keep an offcut for a finish test.
- Ask for product-specific coating instructions if the blank is preprimed or prefinished.
You do not need a branded sign-making kit to get a good result. A carefully chosen board from a lumber supplier can be the better starting point when its material and condition are clear.
Care and maintenance
Inspect the sign when changing seasonal decorations and after severe weather. Look at the bottom and back, not just the lettering. Address peeling, cracks, loose hardware, and exposed edges before returning it to its position. Let a damp sign dry before putting it into storage.
There is no defensible universal lifespan for a porch sign. Real Cedar’s maintenance guidance connects peeling and blistering with moisture and poor adhesion. If a finish repeatedly fails in one spot, investigate the water source instead of adding another coat over it.
Frequently asked questions
What is the best wood for a painted welcome sign?
Our starting choices are Exterior-rated MDO for a panel-style design and a straight pine board for a sheltered, seasonal sign. Cedar is also suitable for paint when prepared with an appropriate stain-blocking primer.
Can I use pine outside if I seal it?
You can finish pine for exterior use, but a coating does not eliminate the need for a suitable location and maintenance. For this project, we would use pine under substantial cover and choose cedar or an Exterior-rated panel when weather exposure is harder to avoid.
Is plywood suitable for porch signs?
Yes, when the panel is specified for the exposure and properly finished. Check its bond classification and intended use, then protect cut edges. Do not assume ordinary interior plywood or Exposure 1 sheathing is suitable for permanent outdoor display.
Should I finish the back as well as the front?
Yes. Plan a complete exterior finishing system around the whole board. The back, lower end, and newly cut edges are easy to overlook when most of the work goes into the lettering.
Can I put vinyl letters on wood?
Check the vinyl maker’s approved surfaces and exterior-use instructions. A smooth, clean, fully cured painted surface is a more sensible starting point than rough or damp bare wood. Test an offcut before committing to the finished sign.
Do I need to buy expensive hardwood?
No. For a decorative porch sign, the right exterior suitability, surface, finish, and mounting are more important than buying an expensive species. Spend first on a sound board and a finishing system you can maintain.
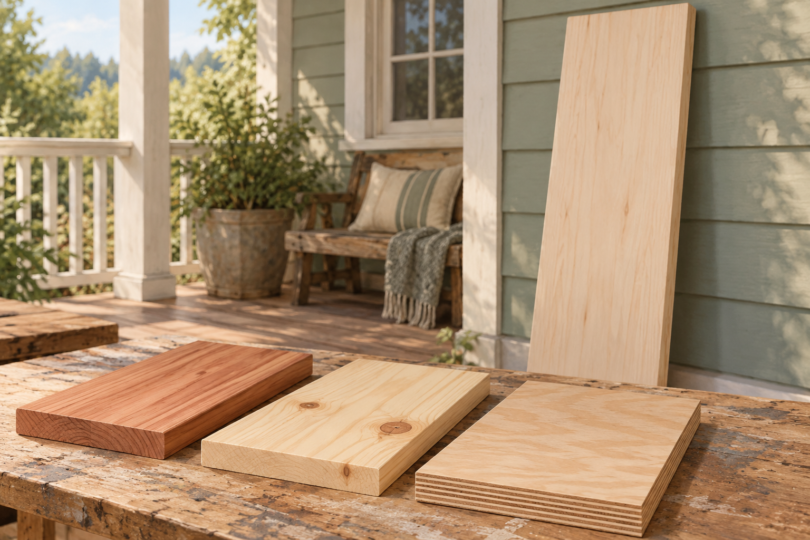
Image note: Generic AI-generated editorial illustration of wood samples and a blank porch sign; not a photograph of a specific wood product or a material-grade verification.